How Reality Capture Verification Has Evolved Since 2018
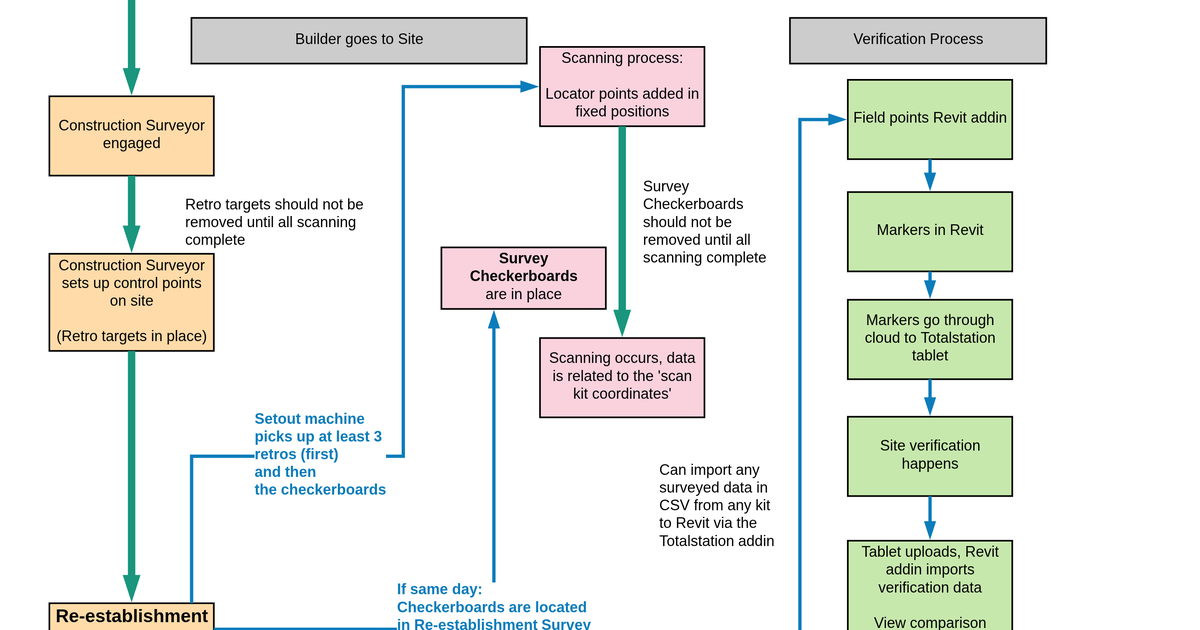
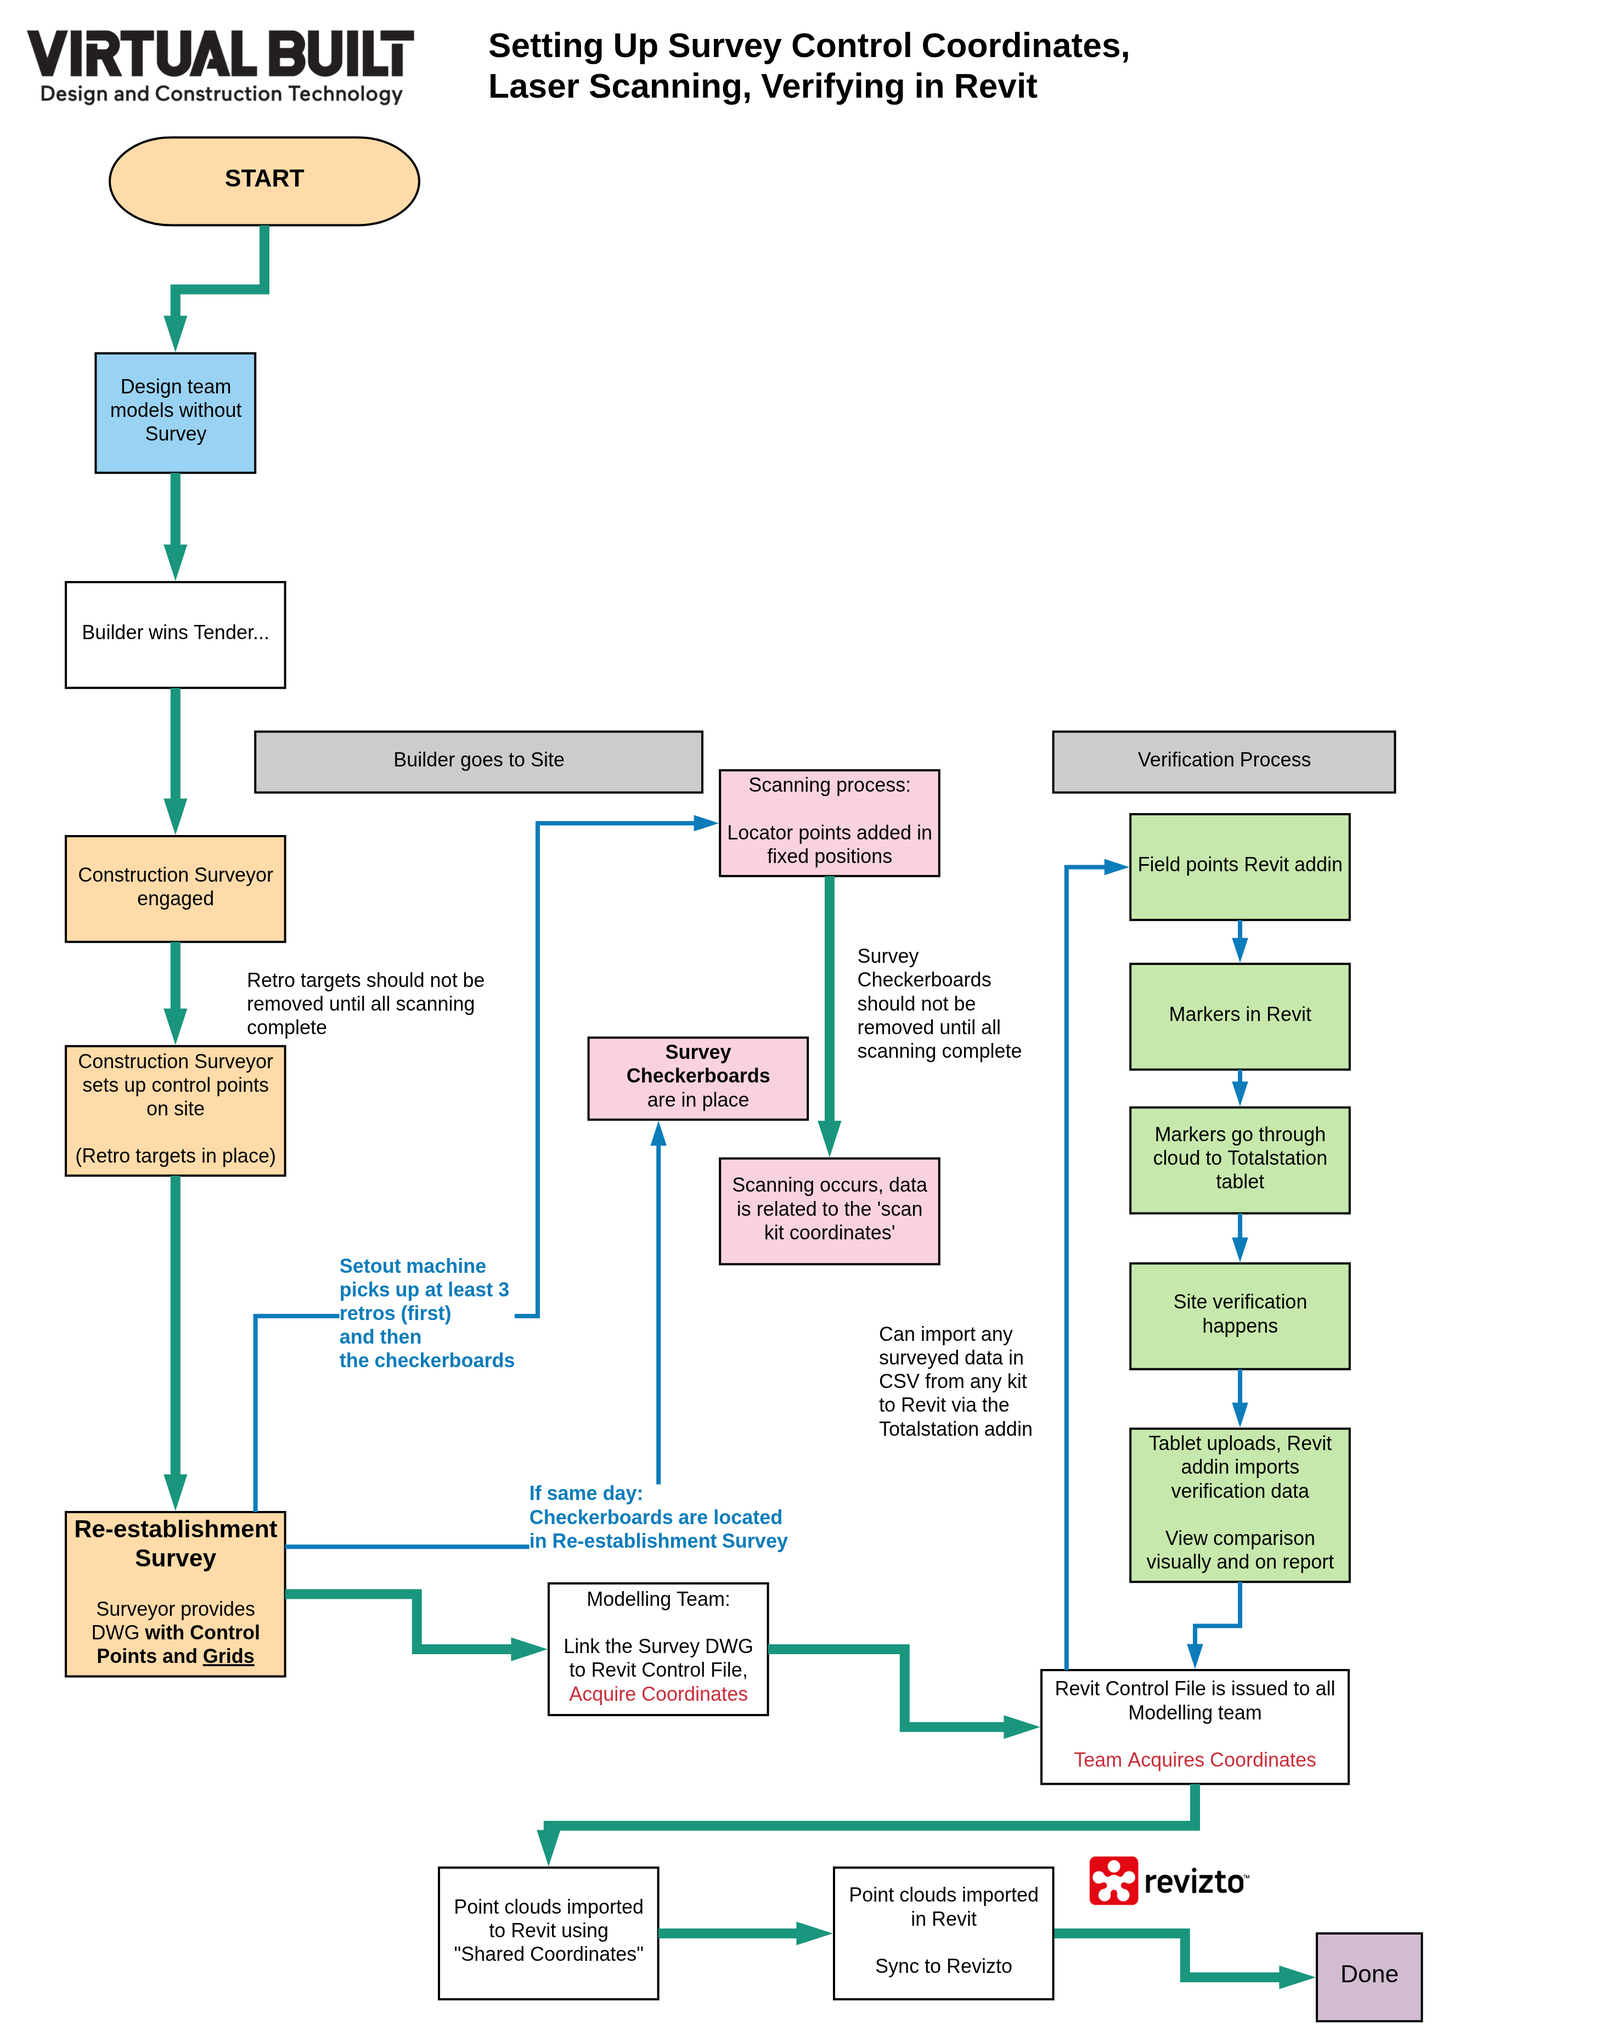
In October 2018 I drew a flowchart. It was for the team at Virtual Built Technology, and it had a very unglamorous title: Setting Up Survey Control Coordinates, Laser Scanning, Verifying in Revit.
That same week I wrote about Shared Coordinates and the Revit API, and said that shared coordinates take minutes to explain intellectually, but years to master emotionally. This flowchart was my attempt to shorten the emotional part for everyone else.
Eight years later I pulled it out of the archive. The tools have changed a lot. The workflow mostly hasn’t. And that tells you something.
The problem: three versions of zero
Look at the first box after Start. Design team models without Survey.
That’s not a criticism of designers. It’s just how most projects begin. The architect picks a sensible origin, the engineers link to it, and everyone works happily in a coordinate system that has no real relationship to the ground.
Then the builder wins the tender and goes to site. Suddenly there are three versions of where things are:
- the design models, in whatever coordinates they started with
- the surveyor’s control, tied to the site and the real world
- the laser scanner, which records everything relative to its own “scan kit coordinates”
Verification means comparing those things. If they don’t share a zero, you aren’t verifying anything. You’re measuring the error in your setup and calling it a construction problem. Or worse, you’re hiding a real one.
A beautiful, dense point cloud that is registered to the wrong origin is worse than no point cloud at all. People trust it.
The solution: one chain of control
The whole diagram is really one idea. Every dataset gets tied back to the surveyor’s control, and the Revit Control File is how that control reaches the modelling team.
Surveyor sets control. Surveyor issues a DWG with control points and grids. The control file acquires from it. Every model acquires from the control file. Scans are tied to the same control. Verification points go out from that model and come back into it. Only then does it all go to Revizto for everyone else to see.
Break any link in that chain and you’re back to three versions of zero.
Workflow 1: survey control and scanning on site
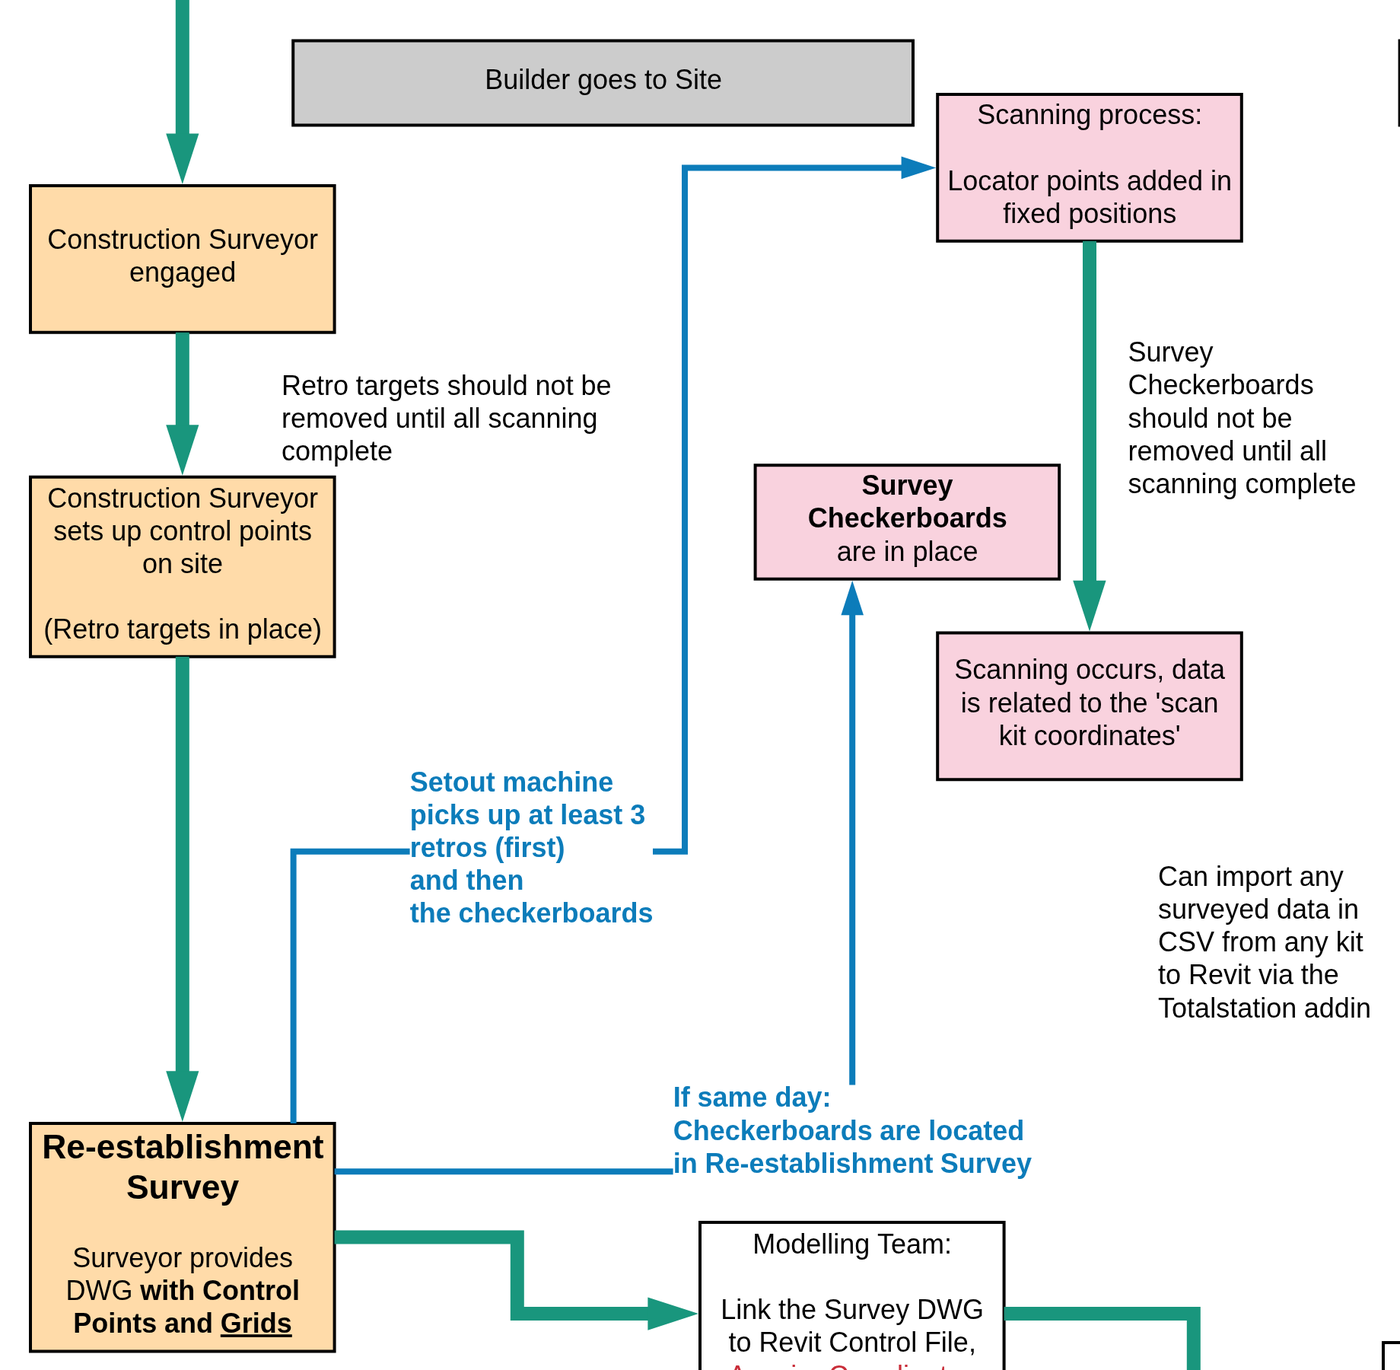
The construction surveyor gets engaged early and sets up control points on site, with retro targets in place. Then comes the re-establishment survey. The surveyor provides a DWG with the control points and the grids. The grids matter more than people think. They’re how the modelling team checks they’ve actually landed in the right place, rather than just somewhere that looks right.
For scanning, locator points go in fixed positions. The setout machine picks up at least three retros first, and then the checkerboards. If it’s the same day, the checkerboards get located as part of the re-establishment survey.
The scanner records everything in its own scan kit coordinates. Those surveyed checkerboards are what let you bring the scan into project control, instead of just stitching scans to each other and hoping.
Retro targets and survey checkerboards should not be removed until all scanning is complete.
I wrote that on the diagram twice, once for each. That was deliberate. Somebody always wants to tidy up.
Workflow 2: the Revit Control File
Back in the office, the modelling team links the survey DWG into a Revit Control File and acquires coordinates from it. The control file is then issued to the whole modelling team, and each team acquires coordinates from the control file.
Why acquire, instead of just typing in the numbers? Because Revit doesn’t trust your numbers. As I found in 2018, two models can report functionally identical shared coordinates and Revit will still tell you “The host model and the link do not share the same coordinate system”. The relationship is created by Acquire or Publish, not by matching values. Hashtag why-revit-why.
At the time, BIM 360 Design only supported Acquire Coordinates, not Publish. That actually suits this workflow nicely: one source of truth, and everybody acquires from it. If you need to fix coordinates on a project that is already underway, I covered the techniques in Updating Shared Coordinates on a Revit Project.
Workflow 3: the verification loop
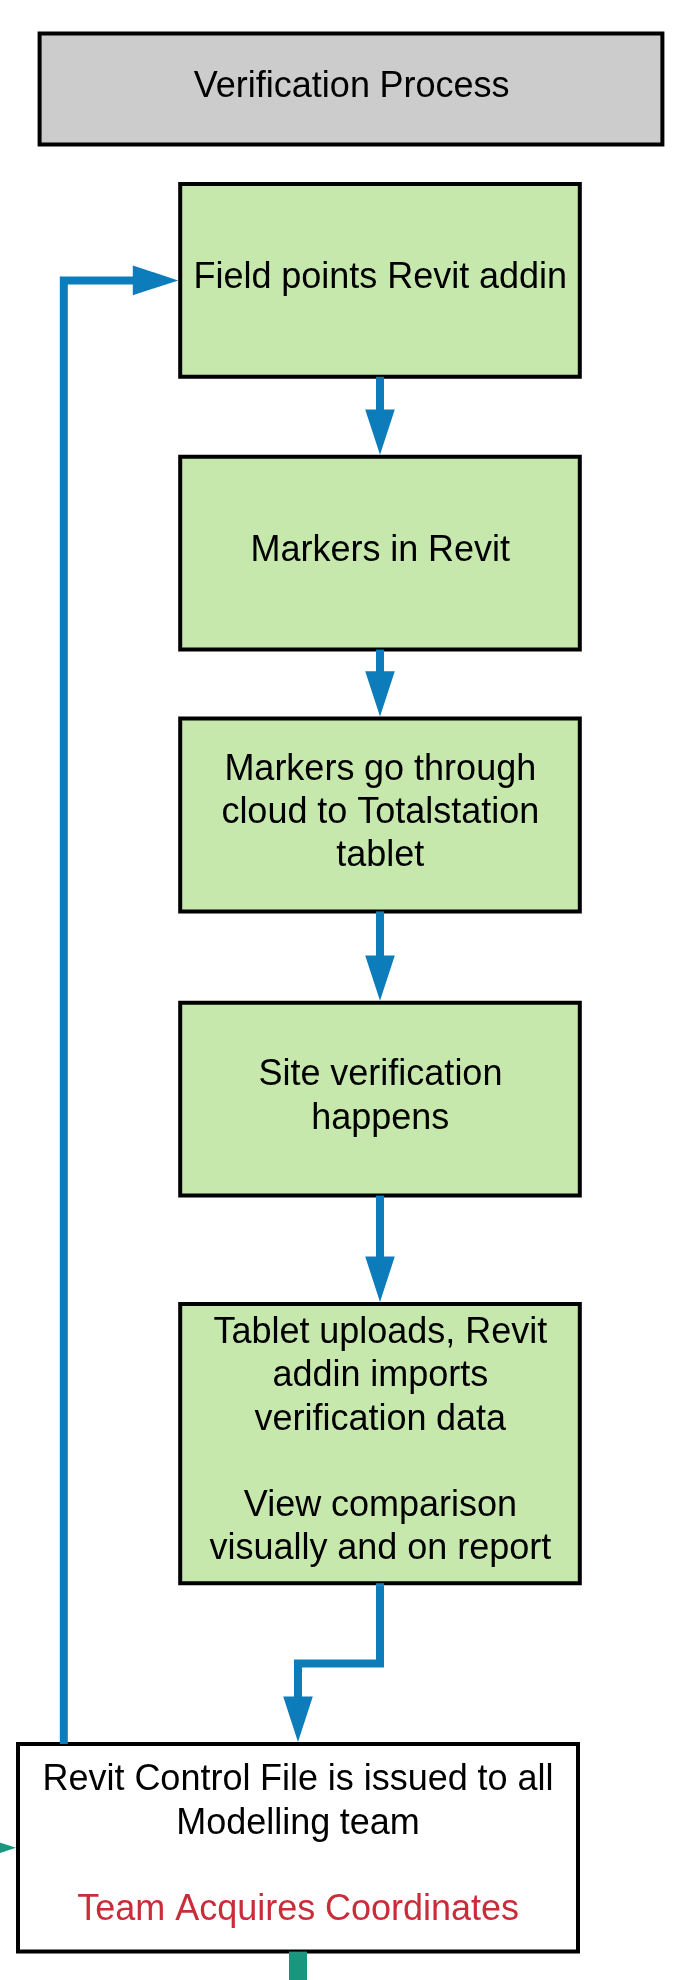
This is the green column, and it’s where the “verifying in Revit” part of the title happens.
- A field points Revit add-in places markers in the model.
- The markers go through the cloud to the total station tablet.
- Site verification happens.
- The tablet uploads, and the Revit add-in imports the verification data.
- You view the comparison visually, and on a report.
The important part is that it’s a closed loop. The points go out from the model, in the model’s coordinates, and come back into the same model. Nobody is re-keying values from a field book.
There’s a small note beside this column that I still like: you can import surveyed data in CSV from any kit via the total station add-in. Verification shouldn’t depend on which brand of instrument turned up on site that day.
Workflow 4: point clouds into Revit, then Revizto
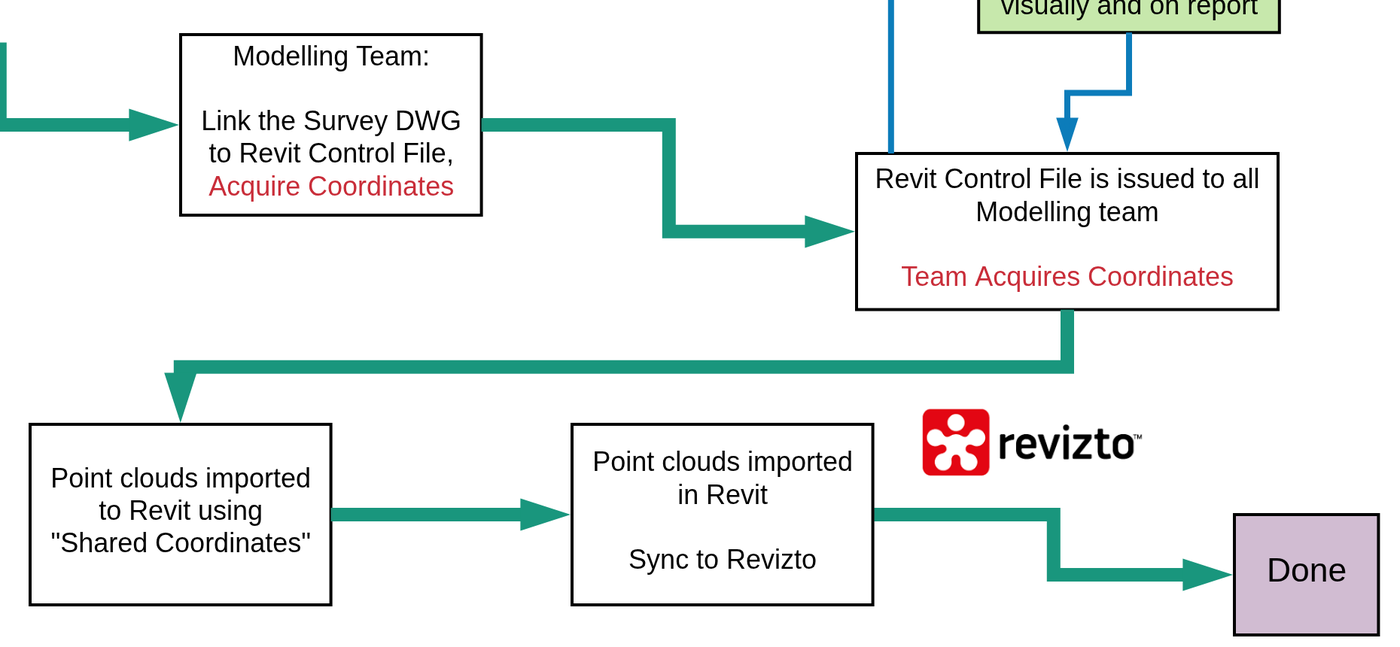
Once every model shares the control file’s coordinates, point clouds come into Revit using Auto – By Shared Coordinates. If the clouds were registered to the surveyor’s control, they just land. Check them against the grids from the survey DWG anyway.
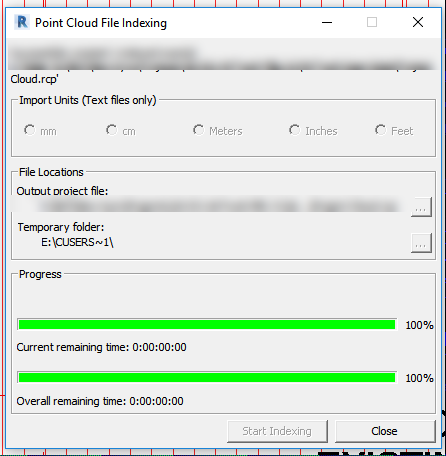
That screenshot is a little time capsule. Back then you could still index raw scans from inside Revit. Revit 2018 was the last version to ship AdPointCloudIndexer.exe. Today that job belongs to ReCap.
Then the clouds go to Revizto. Point cloud support in Revizto was brand new in late 2018. I wrote about decimating a point cloud in ReCap for Revizto that November. Around 50mm suits a lot of site applications. For modelling to LOD 300, something closer to 15mm is a better target.
Revizto is where this pays off for people who never open Revit. The site team, the client and the trades can see the captured condition next to the model, on an iPad if they want. They can raise issues against what was actually built, and overlay the 2D sheets on reality.
And then the diagram says Done. If only.
What has changed since 2018
Capture got faster and cheaper. Mobile and SLAM scanners, scanning total stations, and 360 cameras on a hard hat mean you get more reality data, more often. That makes control more important, not less. Mobile capture drifts, and a weekly scan is only useful if this week lines up with last week.
The cloud moved. BIM 360 became Autodesk Construction Cloud. In 2018, “markers go through the cloud to the tablet” was a step worth drawing on a diagram. Today it’s just how things work.
Comparison got smarter. In 2018, verification mostly meant checking points. Now people expect colour-mapped deviation analysis between scan and model. That’s great, but it compares whatever you give it. Bad registration in, beautiful heat map out.
Revizto grew up. It went from “can it even open a point cloud?” to being where coordination meetings look at the model and reality together.
Verification became data. A PDF report in a folder is a dead end. Verification results should land in the project’s data with dates, locations and tolerances, so you can see trends across a job instead of just a pass or fail for one day.
What hasn’t changed
- Somebody has to own zero, and that somebody is the surveyor.
- The survey DWG needs control points and grids.
- One control file, and everybody acquires from it.
- Don’t touch the targets until scanning is finished.
- Close the loop back into the model.
A checklist for good verification in 2026
- Engage the construction surveyor before the first scan, not after the first problem.
- Get a re-establishment survey DWG with control points and grids.
- Build a Revit Control File from it, acquire coordinates, and issue it.
- Every model acquires from the control file. Nobody types in numbers.
- Leave retro targets and checkerboards in place until all scanning is complete.
- Register scans to the surveyor’s control, not just to each other.
- Bring point clouds into Revit by Shared Coordinates, and check them against the grids.
- Decimate for the purpose: coarser for site context, finer for modelling.
- Push the model and clouds to Revizto so the whole team can raise issues against reality.
- Bring verification results back into the model, and keep them as data.
The technology in this diagram is eight years old. The logic isn’t. Scanners will keep getting faster, and the coordinate system still won’t set itself up.
Stay sharp, and see you on the grid.
Related reading from the archive
- Shared Coordinates and the Revit API (2018)
- Decimating a Point Cloud in Recap for use in Revizto (2018)
- Updating Shared Coordinates on a Revit Project (2019)
- Revit AdPointCloudIndexer.exe and Recap (2020)
- How To Use A Temporary Point Cloud Transformation To Maintain Accuracy in Revit (2017)
- Revit Survey Point and Coordinates Explained (2014)
Discussion
0 archived comments. New comments are not enabled.